Monday, March 31, 2014

Painting Dwarven Forge Dungeon Tiles

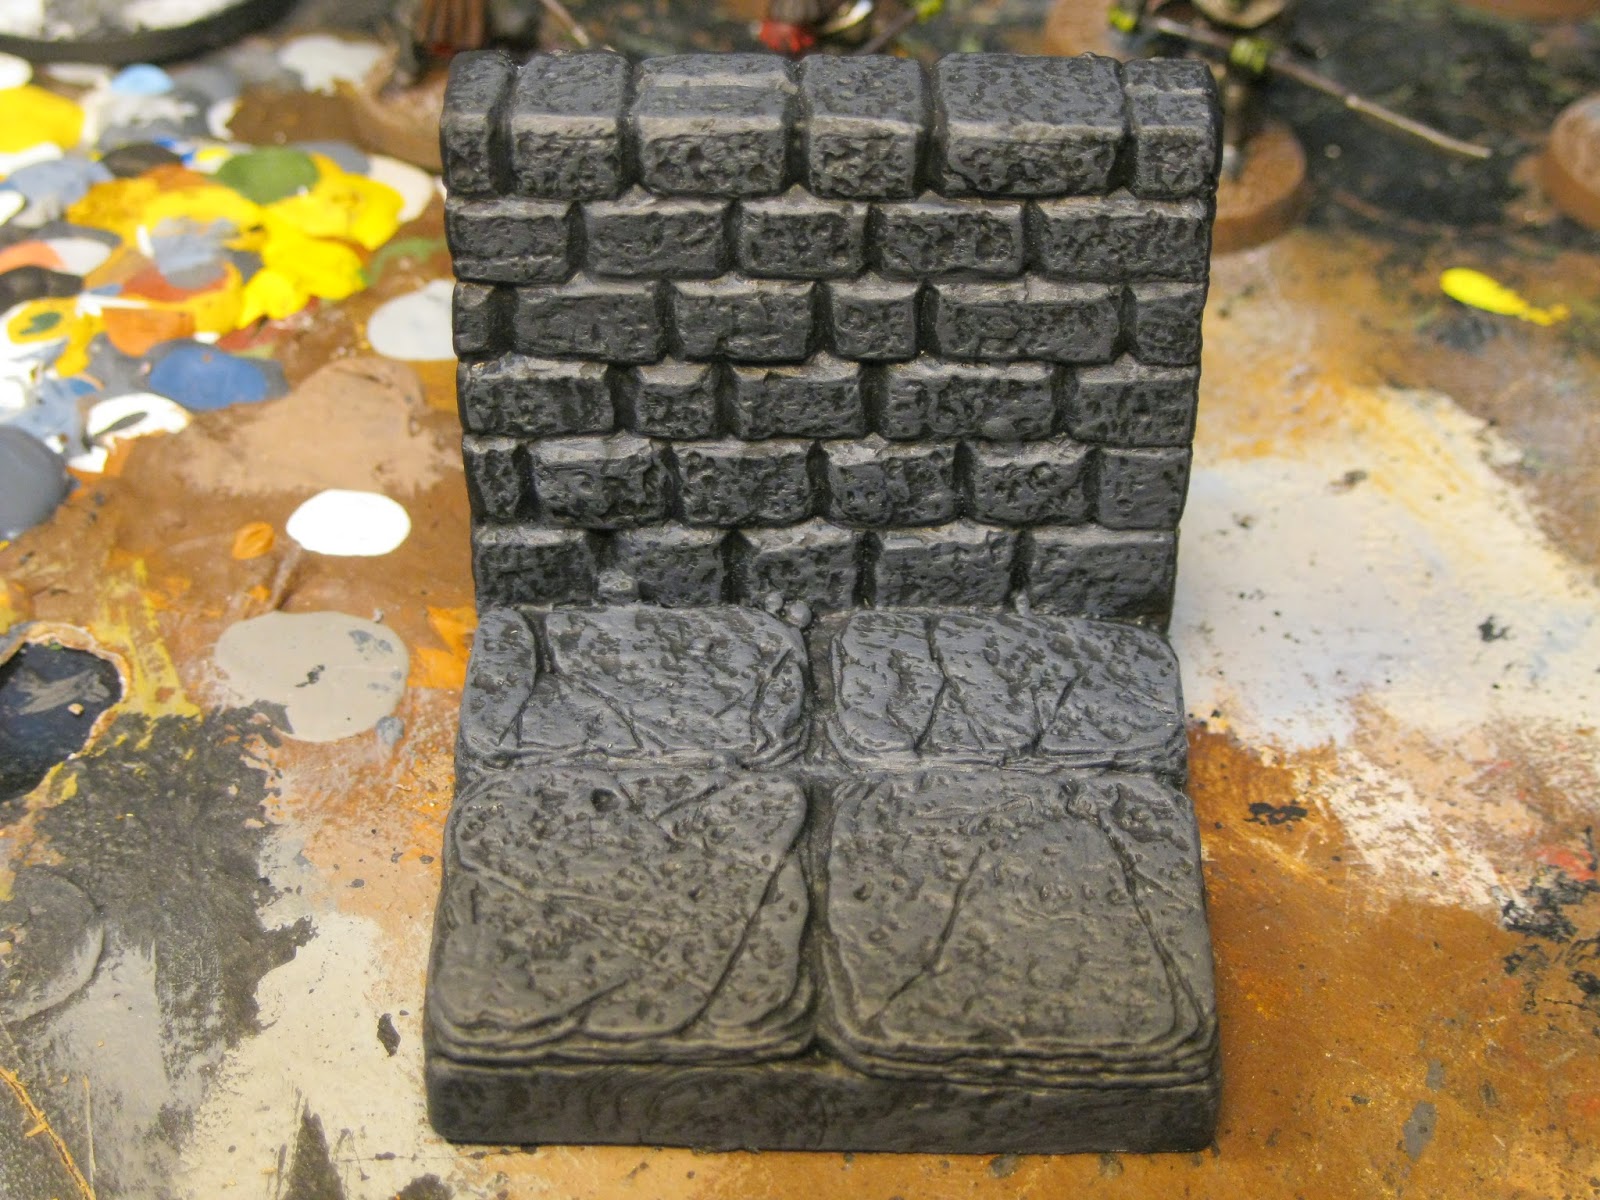
So here's some quick and easy steps to paint my Dungeon Tiles. My steps are basically taken from watching Stefan's video's. As are my color choices. Since I already have loads of paints, I didn't buy his paints, I wanted more tiles with my KS money! But this would work with any paints.

No paint on tile.  Note the shiny surface. This needs to be covered up or it can be seen in the final product. Also the paint tends to bead off this surface, So you need a thick paint.


I use this black as a primer. It covers the shiny areas well.


 Base coat done. Black


Next up is my Base Grey.

This is a heavy dry brush on covering most of the tile. But leaving the nooks and cranny's black.

 
  Next I pick some highlight stones, Just like Stefan does. It's a earthy grey/brown

 I paint 4 or 5 stones per piece.


Now a dry brush across the whole thing

 Dry Brush done. Not to heavy. But you want to get paint on every stone, to highlight the raised portions.


 The last step is a edge highlight.

I just use a very light dry brush to pick out the edges of each piece. I mean very light. Brush completely dry with hardly any paint on it at all. And that's it. Easy as pie.

Xin

Thursday, March 27, 2014

The Village of Hommlet and Dwarven Forge

Back in the early 80's one of the iconic D&D modules was The Village of Hommlet. We played through this module at least half a dozen times. Sometimes helping the town, sometimes pillaging it to the last copper piece. It was a lot of fun.


With Dwarven Forge Cavern Kickstarter going on. I got motivated to get painting the first KS game tiles I got back in November. And then that led to thinking about playing D&D which I really haven't done since the 90's. I started playing with the tiles to see what kind of dungeons I could make. Then I remembered Hommlet. It's a small dungeon, I might have enough pieces to do it. So using the online Dungeon Tile mapping tool I got the upper floor of the Moathouse done.


Later once everything is painted I will have to take an inventory of what I have and see how close I am.

Here's the link to the Mapbuilder page where I made it:
Moathouse Mapmaker

Later, Xin

Tuesday, March 25, 2014

Dwarven Forge Kickstarter Past and Present

 As I mentioned on March 12th, The Dwarven Forge Cavern Tile KickStarter has been launched. It was funded in 10 minutes, which was incredible since they were asking for double the amount of money they asked last time.


So as I follow the KS Campaign, and watch the amount go up and free stretch goals get added, I was inspired to dig out my Game Tiles from the first KS. Everything on my painting table has been pushed aside as I start to paint the Game Tiles.

Unpainted out of the box.

I spent at least a week trying different painting schemes. Primed and unprimed. Washed and unwashed. They are supposed to be paintable right out of the box. I think I've finally landed on my process, 99% there. And you need a process, I have 250+ pieces to paint. I also want to start modding some tiles. Make Custom tiles for things that will add to a dungeon.

 2 Coats of paint, waiting on dry brush step. DOH, forgot to take picture after drybrush and highlight.

One thing I learned from the 1st KS, and will apply to the 2nd KS, no matter how much you think you can get away with, you will need more. I got 3 sets last time, and I see I want at least 1 or 2 more. You can still get the sets from Dwarven Forge, you just don't get the stretch goals. And that really adds up and drives the price per piece down.

Right now I'm in for2 sets of the Cavern Tiles. I will up that to at least 3, maybe 4 with room for 1 or 2 addon packs.

So my advice to you if you jump on this KS, buy as much as you can afford. You won't regret it. Cause no matter how much you buy, you will want more. I will document a step by step process for my tiles in a future post.

Xin

Wednesday, March 12, 2014

Dwarven Forge Kickstarter 2 is now live


Dwarven Forge Cavern set Kickstarter went live at 11am est. It was fully funded in 10 minutes. I'm in for 2 sets just as a place holder, I will make a decision later on to see if I want to up the amount and get more. The stretch goals will have an impact on this. As this project delivered right on time last year, I expect good things from this. It will be a fun ride as stretch goals get unlocked. Actually by the time I finish this post, I expect the first stretch goal will be reached.

Check the pics:


Ciao, Xin


Monday, March 10, 2014

Asteroid Buster game at Cold Wars

This past weekend was Cold Wars 2014 in Lancaster PA. All the time and effort I put into my Asteroid Base was about to be showcased.

You can see all my WIP posts building the Asteroid Base here:
Part 1, Part 2, Part 3, Part 4, Part 5, Part 6

The battle was for 8 players. I had 5 signups and 3 Walk ups. I set up Saturday night in the main ballroom and we got down to it. It was a mix of beginners and veterans. I split up the veterans and we had at least one kid/grown up pair on each side as well. So the rookies were in good hands.

Scenario Set up:
The Rebels have taken over a smugglers base on an asteroid. The dense asteroid field keeps out the bigger ships. The Empire has to send in small fighters and bombers to destroy the base.
Rules:
The Empire has to use Proton Torpedo's to destroy the hanger bays. Also the hangers have 2 shields each. Too take down a shield, you need 2 hits from a Proton Torpdeo or 2 hits from blasters from the same ship in the same turn. Meaning, you have to overwhelm the shield with blaster fire in one shot.

The turrets would shoot last unless you were making a run at the hanger bays, in which case they would shoot first.
The Imperials had 2 Bombers each with 2 Torpedo's and specially modified Advanced Ties with one Torpedo. 6 Torpedos total. The Rebels knew they had to stop the Bombers, and they also knew some of the other ships might carry torpedos, just not which ones.


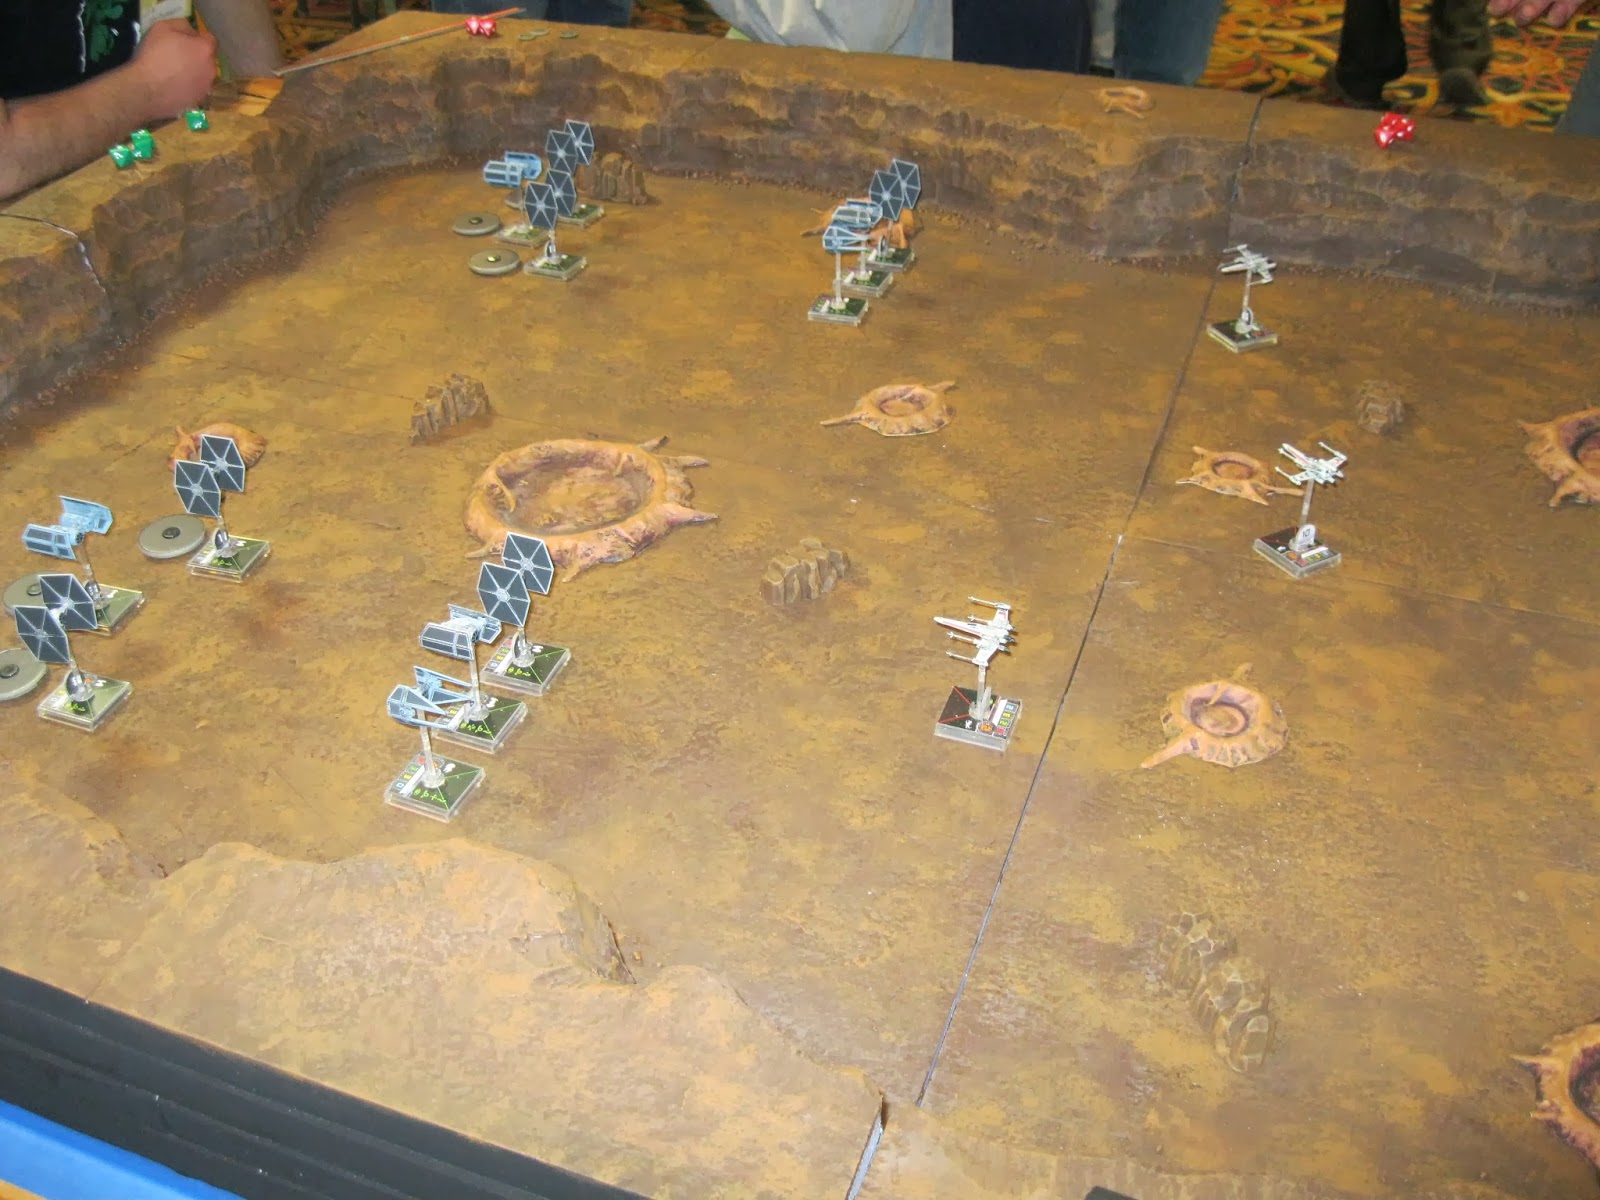
Here's the board just before deployment. I added rock outcroppings at the last minute(painted Thursday morning before heading out). I had also found some craters that I forgot I had. Bought from the flea market  4-5 years ago and never used.

The other last minute change was the addition of turrets my friend Lou sculpted and cast for me. They were so cool I had to use them. All the terrain is for scenic effect. So as players moved, they slid the outcroppings and impact craters aside. I wanted to build some rock spires to fly around, but ran out of time.

 A pic facing towards the Imperial Deployment zone. Sorry about the lighting. The camera kept turning off the flash for some reason.

 The Combat Air Patrol is deployed of 4 X-Wings. 2nd turn will launch 2 A-Wings and 2 Y-Wings.

The Imperials come in 2 waves. I think the first wave was 2 Intercepter, 2 Advanced 2 Ties. The 2nd wave will be 4 ties and 2 Bombers. The X-Wings accelerate to attack speed.

 Stay on target!


  2nd wave of Rebels launch! I might have photoshoped out some flight stands on this one.

The Bombers and escorts drop down into the crater.

 There should be a flaming pile of X-Wing in front of that first wave of fighters. 1 vs 3 didn't work out well. First blood, Empire!


 View from the Imperial side

Now really starting to mix it up. The Imperials had a very hot dice hand early on.

 Too be honest, about here, all the players were moving on their own and all the work of putting on 2 games was catching up with me. I zoned out on actual play by play action. I was pretty exhausted.


The attack up the right side was making more headway. The rebels got some bad Crits that really slowed them down from going after the Tie Bomber.

 The Bomber's escorts took out the small turret. The Imperials used massed blaster fire to bring down the shields, and then the Tie Bomber took out The Rebel Hanger Bay. One down.

 The rebels were really starting to be short of ships at this point. However they did manage to bring down the other Advanced and Bomber. Now the Imperials only had 2 torps left.

The Imperial Squad does a nice formation turn towards the other hanger bay. All rebel ships are now trying to head them off.

 Looks like the Rebels only have 2 A-Wings and 2 X-Wings all of which are pretty banged up

Rebels Closing in. The Advanced and Interceptor take out another turret. I think the A-Wings become flaming wreckage right after this picture was taken.

Imperials use a torpedo to bring down the Hanger shields. Next turn could be it. 


The X-Wing lining up to shoot the Bomber is destroyed before it can get a shot off. The Imperials just have to fire a torpedo. NO TARGET LOCK!!!! The Imperial player who had been playing brilliantly forgot the Target lock. I think he started banging his head against a nearby wall. He cannot fire the Torpedo. He will have to swing around and line up another shot.

At this point, the Rebs had one X-Wing left, so we called it. It would have been very easy for the Imperial to swing around and come in again and very little the lone X-Wing could have done about it. Imperial Victory with the last torpedo.

Conclusions,
I think everyone had a good time. It was a well mannered, fun bunch of players. I think the kids had a great time.

I spend a lot of effort to make a very balanced scenario, but there are things beyond your control. I have no control over a hot dice hand. I have no control over how much or how little players get involved. You just have to take what comes and roll with it.

I think if I run this scenario again I will make some small changes. In our play test, with nearly equal points, The rebels destroyed the Empire, because they knew to ignore the ties. So I swung the points to the Empires side by a good margin, and "hid" the torpedos.

I think that was the right call. The mistake I made was ALL the Imperial Pilots were better than all the Rebels. I need to vary the skill levels. It was still a close game, but could have been better.

It was a lot of fun planning, building and hosting the game, I hope the players and readers enjoyed the show.

Xin


Thursday, March 6, 2014

Asteroid Base, Last update

I'm leaving today for Cold Wars. I'm mostly done. Even if I had another week, I'd still be making addons to the Asteroid Base. The hard deadline of departure has force me to say, Done!

My very good friend Lou, has sculpted and then cast up some gun turrets for me. He is just crazy good with wargaming talent. Here are a few last pics before I leave.

I'm still playing around with the scenic pieces I want to add to the battle board. Hell this morning I was up at 7am painting new terrain pieces.


So that's it. Off to Cold Wars. The final board will look a little different once I set up the game, but I have 95% done of what I want.

I'm out, see you at Cold Wars, Xin

Tuesday, March 4, 2014

Building my Asteroid Base, Part V

I got a lot of work done last night. However that was complete negated by my own hand when I started adding design changes. I added a few elements that then needed to be glued and or painted. Then having to wait for them to dry is the longest step. While waiting for the paint to dry, I did manage to get the LED lighting done. With LED lighting kits, it is super simple. Almost as simple as plugging in a light.

Here are the pics:

 The crater was too clean. It's easy to add debris and clutter, but the X-Wing game really needs a level flat surface to play on. So my compromise was to add rocks and sand into the rim along the walls. After lining the walls with sand and rocks. I soaked it in white glue from a spray bottle. Then turned up the heat and put a fan directly on the table.

I had always intended to have an entrance to the crater, but forgot about it. A hot wire foam cutter took care of that pretty quick. Some more brown paint and it's almost as far along as the rest of the crater.
 Once the white glued dried(which took awhile), I went back and and painted over the sand and rocks with the base color. I watered down the paint a lot as I needed it to flow into the nooks and crannys. The cost of that is a long drying time, even with the fan. So the dry brushing will have to wait till tonight.

Here is a close up of one of the entrances and my newly painted debris.

 Another thing I started working on while all this drying was going on, was the LED lights.I bought 2 "miniatures kit" from http://www.modeltrainsoftware.com/. Each kit somes with a battery lead, switch and 5 LED lights. LED's require resistors, but these come already attached. All you have to do is twist the wires together.

 I ran all 5 LED's in parallel. Then just taped every thing to the roof of my Hanger Bays. The battery is heavy, I will have to put more tape on it as it keeps dropping.

The junction of all the wires I just covered with Electrical tape. It really couldn't be simpler.

Power on!

 The Rebels won't need to work in the dark

Red 5 launching

The last part I got done yesterday was to start painting the Hanger Bays

I could have easily gone into diorama mode detailing out the bases, but I had to restrain myself. As it was, my friend Lou decided that wasn't good enough and started adding details anyway. Lou is an incredible scratch builder. It didn't take him long to come up with a few visual improvements.

2 Build days left!

Xin