Thursday, July 6, 2017

Building Aspern-Essling Battlefield, Part 4

We got a lot of work done yesterday. On top of dealing with emergency Dental work for my wife. Bob and Lou are painting almost 1800 figures, while Alan and I continue to work on the table.


 The fields starting to take shape


 Working on a small part of Vienna. Played no part in the battle, but fun to model.


 Bob came over to help with the buildings.


 Another angle of the fields getting flocked.


 Our enormous ball of yarn. We use it to make hedgerows.


Yarm spread with glue.


 The sticky yarm dropped in flock.


Completed hedgerows. These will be augmented with larger brush and small trees, when put on the table. Very mind numbing work.

We are pushing hard because we need to do the River pour by Saturday, to give it time to cure.

This is the time I start to wonder why we do this. We are deep in the middle of the build. Once we get closer to the end it will be worth it.

Xin


Wednesday, July 5, 2017

Building Aspern-Essling Battlefield, Part 3

Just a quick update as we work feverishly to get the table done. Right to the pics.


We forgot to put in a small dike between Asper and Essling.


 Cleaned up the board. A lot of edge work. Along the roads, rivers and towns. It looks better but really doesn't look like I did much, yet this consumed several hours of work. Also repainted town foot print. Didn't like the previous color.


 Just another angle.


 On one corner of the board we have a small chunk of Vienna that is mostly off map. I drew outer fortifications on Overhead projector sheets.


Surrounding Vienna is the Linienwall. The Linienwall was an outer line of fortifications for the city of Vienna, Austria, which lay between the city's suburbs and outlying villages. The construction of the Linienwall was begun by order of Emperor Leopold I in 1704 to protect against attacks by the Turks and the Kuruc (a group of anti-Habsburg rebels). Constructed in 1704, it was razed in 1894 to make way for the Vienna Beltway.


 I then place the sheets on to our foam insulation. Using a needle, I punch thru the sheets making small holes in the foam. Then I can use a sharpie to draw out the wall.


 I cut out around the wall and test the fit.


 Testing fit and look.


 Using my Proxxon foam cutter that can make angled cuts, I slowly cut the wall.


 One section done.


We glued plaster walls to the slopes of the Linienwall. Originally the wall was an earthwork, but was latter faced with bricks.

We should be putting on flock today, and casting more buildings and, and, and....lots to do

More to come, Xin


Friday, June 23, 2017

Building Aspern-Essling Battlefield, Part 2

We are back again with some more updates on our table for Historicon. No matter how much time we think we have, it is never enough. And life is always getting in the way. Ok lets get on with the pics.


 After the light weigth spackle drys, we give it a quick sand to smooth out spackle ridges. I should have spackled more of the river bed. Getting paint in those crevices is a f'ing pain.


 We use Jeff's Fabulous Road Tool(patent pending) to score roads into the foam. After the outside of the roads is marked, then we go back and score in ruts. This takes a bit of time.


 Painting the roads. Again getting the paint in the ruts ARGGHHHH!


 Now block painting in the rest of the board. Base field color and village footprints.


 Hard to see, but I was testing different shades of paint for the base color. In the end it really doesn't make that much different as 95% of the board will be covered with flock.


Our resident sculptor Lou has given us some more buildings. I am making a mold using Smooth-On PMC 121/Wet. The only reason I use this particular type is the local model train store stocks it.


 My home made vibrating table using a hand held back massager that I got for Fathers Day 3 years ago. It not pretty but it gets the job done. 24 hours to set.


Work on the table gets interrupted as I got my very small delivery from Dwarven Forge Kickstarter. So we took some time to play with the few sets I got. My kids being in college as really put the brakes on my Dwarven Forge crack habit.


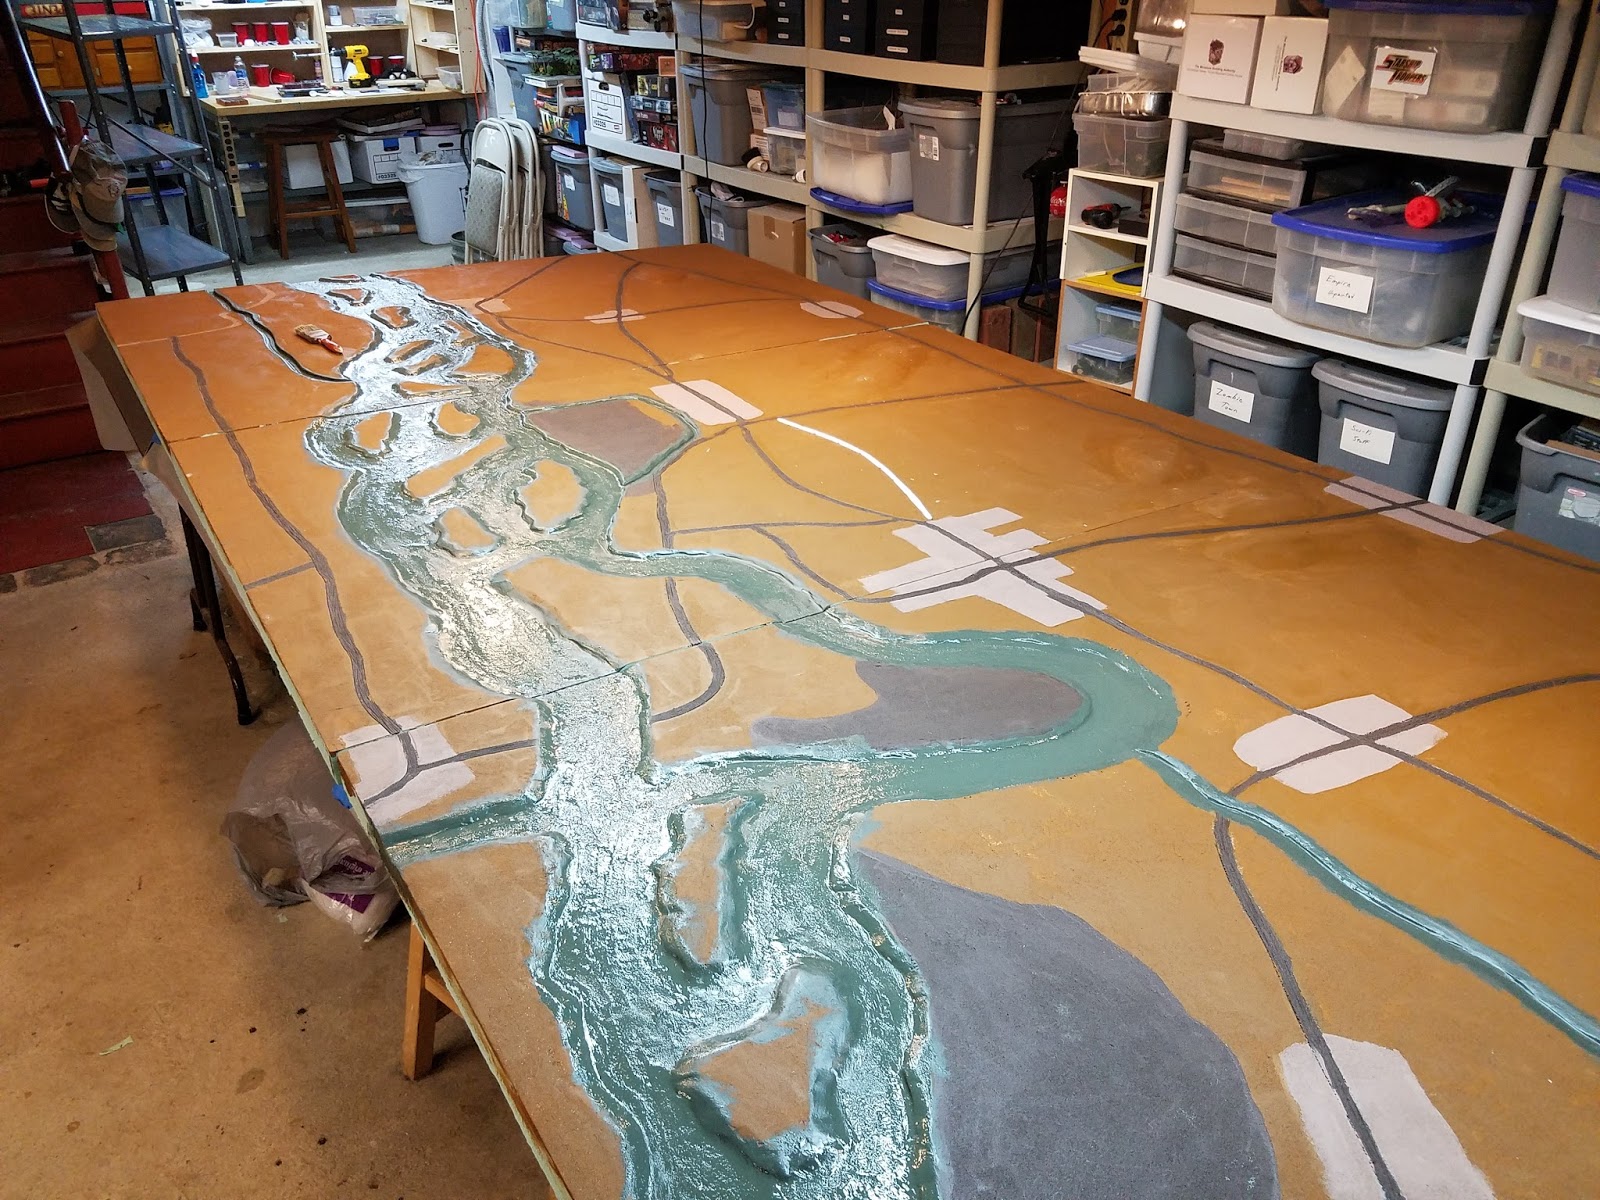
 Painting the river a yucky scummy green.


 Now the entire board has paint on it!!!


We have to go back over the board and fix overpaints and missing spots in the foam. I also edge the shore lines with a muddy color.

More updates to come and at a faster pace as we run out of time, again.....

Xin/Jeff, Alan, Bob and Lou

Friday, June 2, 2017

Building Aspern-Essling Battlefield, Part 1

Well once again there is no adult supervision in my basement.We will be running 6 events at Historicon. The battle of Aspern-Essling 3 times, and I will be running Frostgrave 3 times.


We start off with building another huge table, 6x12 feet for Aspern-Essling. Lets get right to the pictures.


 We start off with 3 sheets of Kingspan insulation from Lowes. Each sheet is 4 feet by 6 feet and 2 inches thick. We would prefer using the pink insulation from Owen Corning, but we could not find the size we wanted. In our opinion the pink board is better than the blue or green board. The color of the foam is green, but that doesn't show in the pictures.


Using our patented glass bead method we lay out major terrain features on the board. Rivers, roads, towns and hills. We use the glass beads cause that allows so to see the board and make adjustments till we think the layout is historical and fits on the boards. After we are happy with the position of all the terrain features we draw them in with different colored sharpies.


We took a break from building to organize our lead. It was still a bit of a jumble from our Eylau game Cold Wars. We also had to take inventory and figure out what additional units we needed for Aspern-Essling. Turns out a lot! A very big order was placed to Old Glory. All the figures we use are 10mm Old Glory. Thank god for the Old Glory Army membership.


It took a few days but we are all sorted. We love these troop trays from Dave's Baggage Terrain. All our figures are mounted on metal base stands from Wargame Accessories. The troop trays are lined with sheet magnets which keeps all our little gus firmly in place.


With the figures all put away, we are back to building the table. Aspern-Essling has a lot of water features. They will feature prominently on our table. We are using a Dewalt router to carve out the rivers and islands. It was hard to see the lines drawn while routing so we added some LED lights to the router.


The Danube carved into the insulation.


All done. A note of caution when working with foam insulation. The particles are toxic to breathe. We have a Shop Vac attached directly to the router with an air filter on it. We also wear dust masks and we have fans venting the basement to the outside. As we work. Once done we leave the basement for 30 minutes to let the air clear. The shop vac handles the majority of the work.


We use X-acto knives to carve in river banks.


 To further smooth out the rivers bank we use light weight spackle. This takes a day to dry.


That's all for now, more to come. Thanks for Stopping by,

Xin/Jeff

Sunday, May 28, 2017

Citadel Paints and dropper bottles.

I use Citadel paints as my main paint source, but I hate the stupid bottles they come in. Recently I've seen a lot of people using GW paints in dropper bottles. They buy empty dropper bottles and pour in the GW paint. So I decided to give this a go.


I bought a bag of 15ml dropper bottles from Amazon. There were 25 to a bag. The bag has a bottle, screw top and a dropper top that gets inserted after filling up with paint. It's a slow process but once done will give you better control of your paints.


Start by cutting off the lid from the paint pot. Pour in the paint. I use a coffee stirrer to scrape as much paint as I can into the new bottle. Some of the paints are exceedingly thick, so I drop in some Citadel Medium to thin it out. Water works too. Makes pouring easier. For the first batch I added in small stones to help mix the paint when shaking it.


Once poured, put in the dropper top and screw on the lid. Done. I go the extra step in peeling off the label and sticking it to the new bottle. I also paint the top of the lids so I can see what the colors are.


Here is the first batch of 25 done. Now that I know what's involved and I love the new bottles. I'll do the rest of the paints.


So I ordered 2 more bags and stainless steel agitator balls. They make them for Nail Polish.

It's a lot of work up front, but I think worth it in the end.

I ordered these off Amazon:
Dropper Bottles

Agitator Balls

Now back to paint pouring..,...Xin


Wednesday, May 17, 2017

Making pallets for scatter terrain.

I'm gearing up to play Games Workshop's new game, Shadow War Armageddon. I have almost no terrain for 40k style tables. I did pick up 2 box sets of the game, which comes with a ton of terrain, but you can never have enough terrain. 

I saw on the SWA Facebook page people making pallets as scatter terrain. I loved this idea so last night I rummaged around my basement and found some balsa wood to give it a go. 


 I'm not sure of the size I got, but it was about 1/8 inch(3-4mm) square balsa strip. I used sprue cutters to cut to about 1.5 inches(about 38mm)


 I used my cutting mat as a guide, put the balsa strips 1.5 inches apart(38mm). These are the stringers of the pallet.


 Put something on the strips to hold them in place to glue them. I used a 1-2-3 Block.


Using a low temp glue gun, glue on one coffee stirrer. This is the upper decking.  Glue it all the way to the end of the stringer.

 Glue another coffee stirrer to the other end of the stringer


 Glue one in the center.


Glue the last 2 in the open spaces between the center and each end.


Using a sprue cutter, clip off the over hangs. Clip up right against the stringer.


 Flip the pallet over and glue in the center stringer. Also glue in 3 coffee stirrers for the lower deck. One on each end and one in the center.


 All done.


I made 4 and ran out of the balsa strips to make the stringers.


 After digging through my basement I found another strip of balsa wood, enough to make 4 more pallets. 


This was a very easy project. All told maybe 2 hours, maybe less. I think I need about 4 more, and I'll be done with pallet making. 

Cheers, Xin